Archive | Transformation RSS feed for this section

IBB Myth Busters Edition

23 May

I finished off the floors a few weeks ago and I ‘m happy with the way that the project turned out. During the process I was pleasantly surprised to find out a few of the things I thought were not true.

Myth one: Its expensive
It was really not that expensive and not as difficult as I thought it might be. The biggest expense in the whole project were the sanding pads and the polyurethane. I think I spent $400 total.

Myth Two: Its labor intensive:
I rented an orbital floor sander from Lowe’s and was able to do all four rooms and the hallway in one day. Most of the time I was just standing around holding the sander. As for the staining and poly. It was even easier.

Myth Three: Its dusty:
True, there was dust; but not nearly as much as I thought there would be. The sander really helped out a lot in this regard as it had a built in vacuum which sucked almost everything up. Including every elusive pine needle form the Christmas Trees of the last 75 years. 

Myth Four: Its stinky:
Ok, that one is true.

While doing the sanding I came to the conclusion that this is the first time my floors have ever been refinished. The boards were extremely uneven. It took a while to get every part of each board sanded down when some boards were lower than others. The floorboards are narrow and very thin, almost like yardsticks, and they are face nailed down to the subfloor.  I don’t think the floors were ever sanded down as a whole together. If they were there would be no way that they could have been so irregular. Is it possible that these were prefinished and then installed?

Once the finish was all off and I used all three grits of sandpaper, I stained the floors with a 50/50 mix of English Chestnut and Provincial stains. I did this because I wanted to go darker and I though that this mix looked best with the Gumwood baseboards. Speaking of the baseboards I also sanded the toe kick (because they were really beat up) on all of them and then applied a mix of Gunstock with a touch of Chestnut which matched the color of the rest of the Gumwood right on. 

Finally, I used three coats of water based poly to protect the floors. I suppose oil might have been better but the water based dries much faster and frankly, I needed my house back.


DSCN0520

DSCN0521

DSCN0523

PS. Guess who’s getting a new driveway today?

One year Houseversary mini Home Tour

23 Apr

Its been one year in my house already!

I had these pictures taken by one of my most favorite friends to submit to Apartment Therapy for the Small But Cool Contest but it’s looking like they are not going to be posting my entry. I’d be lying if I pretended that it didn’t bother me that they weren’t accepted, so I think I’ll try and mitigate the disappointment by posting them here.

Here’s the kitchen:

kitchen

Here’s the living/dining Room:

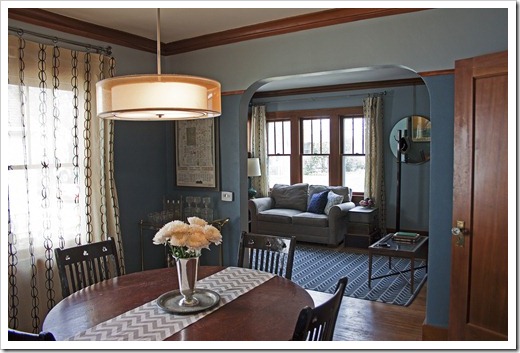
livingroom

diningroom2

diningroom1

bathroom:

bathroom

front bedroom:

bedroom

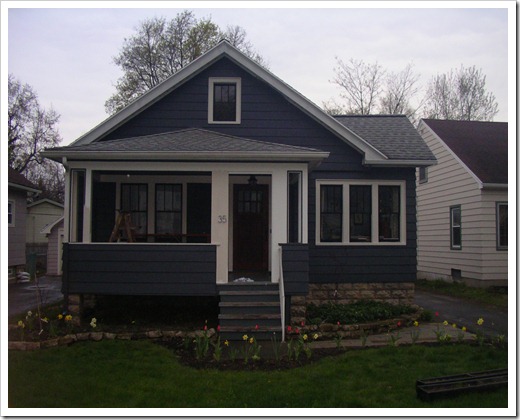
exterior (with the paint job still in progress):

IMGP0228

Itty Bitty Paint Update

15 Apr

It rained most of the day today so I wasn’t able to get very much painting done. However, I wanted to get a better idea of what the house was going to look like once the trim was done. This is what I did get painted before I had to stop. The cream really helps to soften the gray and it actually makes the color look like a really complex blue/gray in person.

IMGP0228

Ittybittybungalow Does Fall

19 Sep

The air is getting cooler out and it was time to remove the overgrown plantings from the window boxes so I swapped them out for these mums. I got a great deal on them (98 cents each) and was able to replant all my window boxes for 12.00. I got a cheap wreath for the door and things are looking much more fall like around here.

In other news… I was able to repair the giant hole in the ceiling and replace the light fixture with a exhaust fan/light combination. This was an exercise in patience. Once I had figured out how to rewire the fan into the old wiring in my house and reconnect the outlet which was tied into it, I had to repair the plaster. Day by by day, a layer at a time. Finally, a week into the job, also known as late Sunday night I finished the plastering, sanding and repainting!

This is what it looked like before:


During:

After:

Itty bitty updates

28 Jul

Just in case you were wondering whats happenin’ at the bungalow here is an itty bitty update. I’m currently trying to finish up the back staircase. I don’t have a great before picture, but I can tell you that they were once all beige and the steps were covered in linoleum with an awful fake stone pattern.  I removed the linoleum and sanded off the adhesive as best as I could and painted the walls with leftover paint from the bedroom and the floor with leftover porch paint and the trim with leftover paint from the kitchen. Total investment for this project was only two new rollers!

Here is a picture from before I started painting:


This was one of those projects that seemed like it was going to be easier than it really was. There were all kinds of hard to reach spots and the beadboard had been painted so many times that it was really uneven and full of old drip marks that refused to be sanded off. I also couldn’t get all the old adhesive off the steps so  they are not exactly smooth. On top of all this they are steps, so I was, and still am constantly painting myself into awkward spots, but I’m hopeful this project will be finished by Friday night. *crosses fingers*

In other news…I’m not sure if I mentioned that I wanted a street tree for the front yard. Our street is pretty well tree-lined and IBB is a slacker in this department. So I decided to be a good street citizen and remedy the issue. After through reasearch I determined the best choice was a London Plane Tree or Bloodgood, which is a type of Sycamore. I purchased this tree and planted and watered it and then it died. Thankfully it was guaranteed and even though I lost all of my paperwork and had no proof at all that I got the tree from where I said I did the super fantastic people at the Garden Factory gave me a total refund. Thank you Garden Factory!

Ok… what else is new?

House numbers:

A new door bell:

And… I hung some dishes in the dinning room:

So there you have it. Everything new at IBB. Now I’m going out for ice cream.

3rd Annual Bungalow Blog Tour

12 May

Welcome to Ittybittybungalow and Thanks for joining me on Stucco House’s 3rd Annual Bungalow Blog Tour.

The Bungalow Blog Tour is a chain of  linked blogs about old houses all over the net. At the base of my post you’ll find a link to take you to the next and previous homes on the tour (everyone’s  links should be up and running by Saturday morning).

Ittybittybungalowis an 864 square foot home in Rochester, NY. My cat and I have been here for just over a month and have been making some pretty solid progress in updating the house and restoring some of the original charm. Here you can see a picture of the house as it looked when I bought it on March 24th, 2011.

Since then I have removed the windows in the porch, installed a new walkway and am currently working on the gardens.

On the inside I have been able to paint most of the rooms, repair some of  the window weights and get settled in many of the spaces but both my kitchen and bathroom continue to be disaster areas. I hope that you will take a minute to view some of my previous posts as they really cover everything I just mentioned in more detail. As a new homeowner I really don’t know much about anything that I am doing and often use this blog as a platform  to get better ideas and advice so please feel free to comment and subscribe I’d love to get input from those of you who have more experience.

Here is a picture of the house as it looks today:

As you can see I’ve made some progress but much more needs to be done. For one -The pink porch needs to go ASAP.

In my posts you can expect to hear about vintage items scored from thrift stores, estate sales, Craigslist and curbs all over the city in addition to updates about my progress both in and outside of the house. You’ll also notice that my blogroll links to all sorts of design blogs where I enjoy browsing for unique ideas for decorating with limited funds, and some where I can read about other people spending lots of money. One of my favorites Apartment Therapy, runs an annual Small But Cool contest each year; which is something I am gearing up to enter next spring.However I know I am going to need lots of help and encouragement on the way from readers like you!

Thanks for visiting,
Brad

Next Tour Stop:  1916 Bungalow

Previous Tour Stop: From the Doll House to the Dog House

Window Boxes and a New Walk

10 May


Check out the newest updates on the front lawn.

Two window boxes which I made from wood and will paint to match the trim on the house.
Two Japanese Maples from the Public Market on either sides of the house
and a new walk to the front door.

You can see that there is an issue in  the middle which needs to be sorted out and I need to plant in the creeping Thyme in between the pavers but its finished for the most part and it much wider and more comfortable to use than the old sidewalk.

Here is a closer look at the window boxes. They are really the first thing I ever built out of wood myself. I know it would have been better if I had mitered the corners but that was above my current skill set. They were really inexpensive to make at about 12.00 each. The brackets were kind of expensive I think 7.00 each but I think they really  make  the whole thing work. You could do it much more cheaply if you had the know-how  and tools to make them yourself.

Tomorrow I’m headed out to pick out some Hostas and other plants from a lady who posted on Craigslist. She is cleaning out her flower beds and is offering whatever anybody wants for 2.00 and 4.oo each which is really going to same me some major cash.

Lastly, here is a look at one of the Japanese Maples I scored for 25.00 under the window box beside the porch.

Total spent on the front yard:

50.oo – Two Japanese Maples
60.00 – Walkway Pavers
18.00 – Mulch
65.00 – Window Boxes

Total: 193.00

I still need to plant some grass and flowers, paint, and some other things but overall I think that the phase one finish line is in sight.